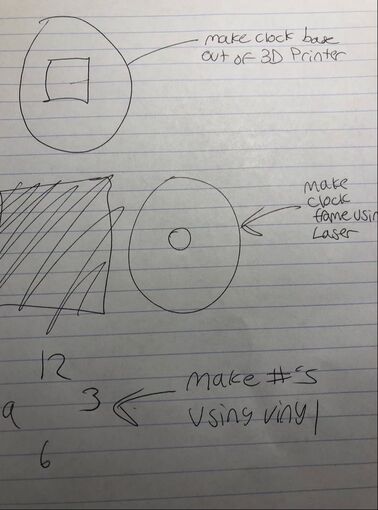
Sketches/Ideas
|
For my final clock project I had to use 3 different machines. The machines I used was the 3D printer, the Laser and the Vinyl Cutter. With the 3D printer I created the base of my clock. With the Laser I created the frame of my clock and the vinyl cutter for my numbers of my clock. To the left is what I put in my designer notebook.
|
3D printer
|
|
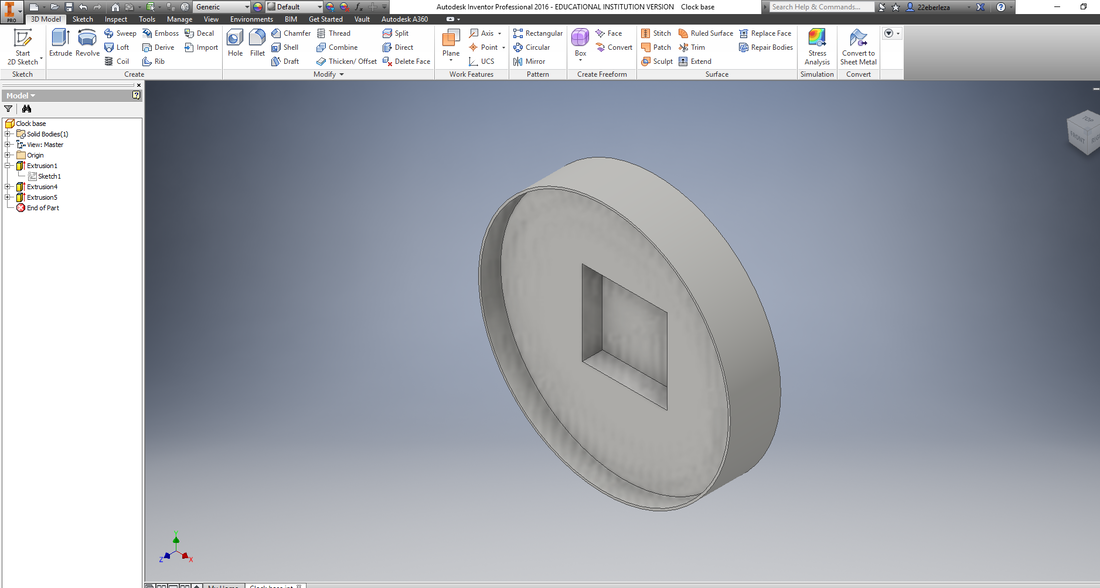
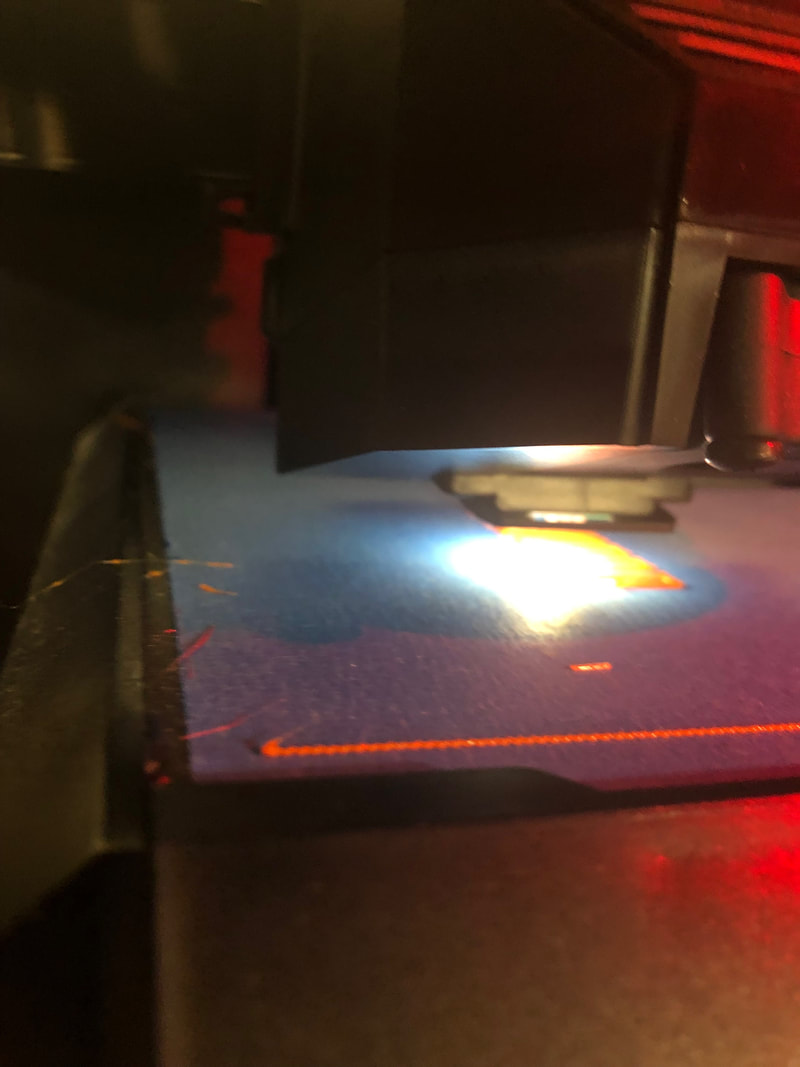
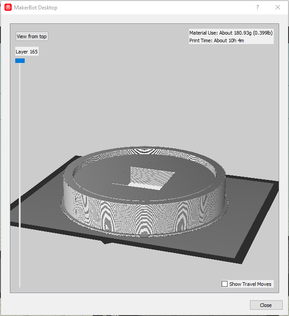
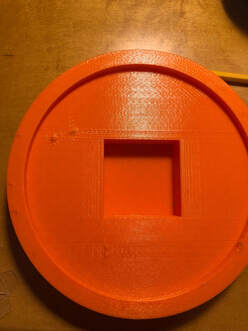
The 1st machine I used was the 3D printer. To start I used Inventor To design my base for the Clock. I have used Inventor a lot this semester so designing the base on Inventor was easy. The top left picture is my clock base on Inventor. Next I set the base up for the printer by using Makerbot. I have not used Makerbot in a couple of months so it took a couple minutes to get used to it again. The top right picture is my base on the print preview screen with Makerbot. Next I plugged in my Flash drive and I began printing. The bottom left picture is my base printing and on the bottom right is my clock base printed.
|
Laser
|
|
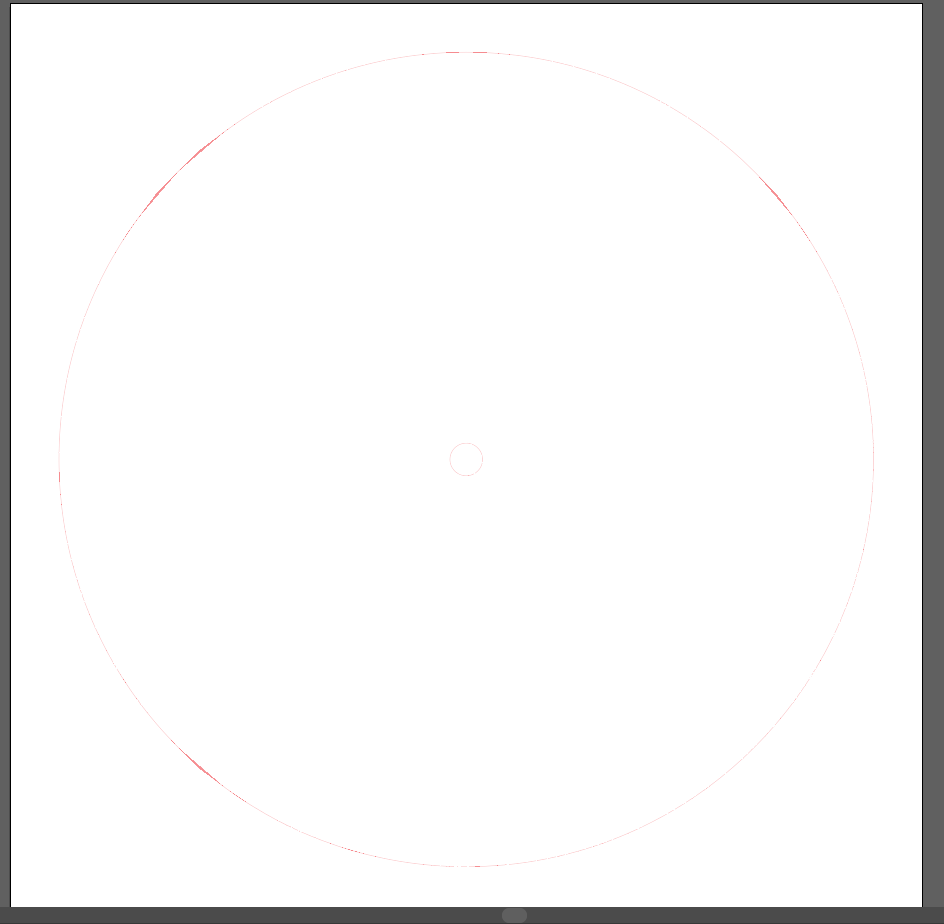
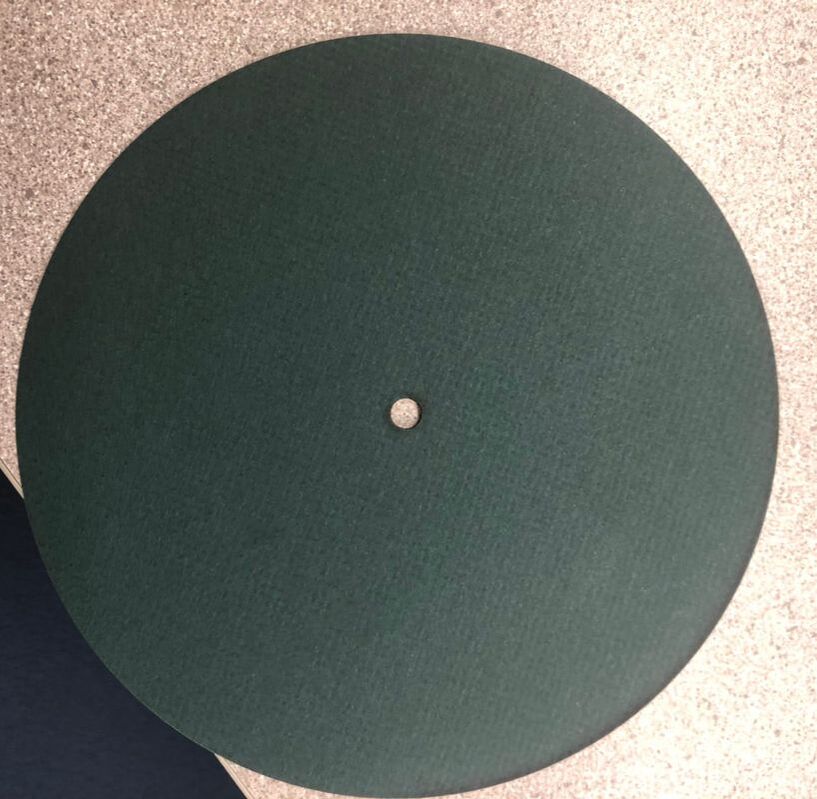
Next I used Illustrator to design the frame of my clock. I have also used Illustrator a lot this semester and it was very simple to design using a circle with a hole in the middle. I used the laser to cut out my frame using matboard which I also used for my notebook covers in the Laser rotation. The farthest right picture is my frame set up in Illustrator and the middle picture is my frame cut out after using the laser.
|
Vinyl Cutter

|
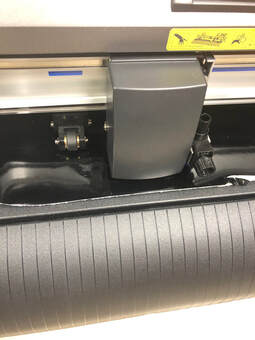
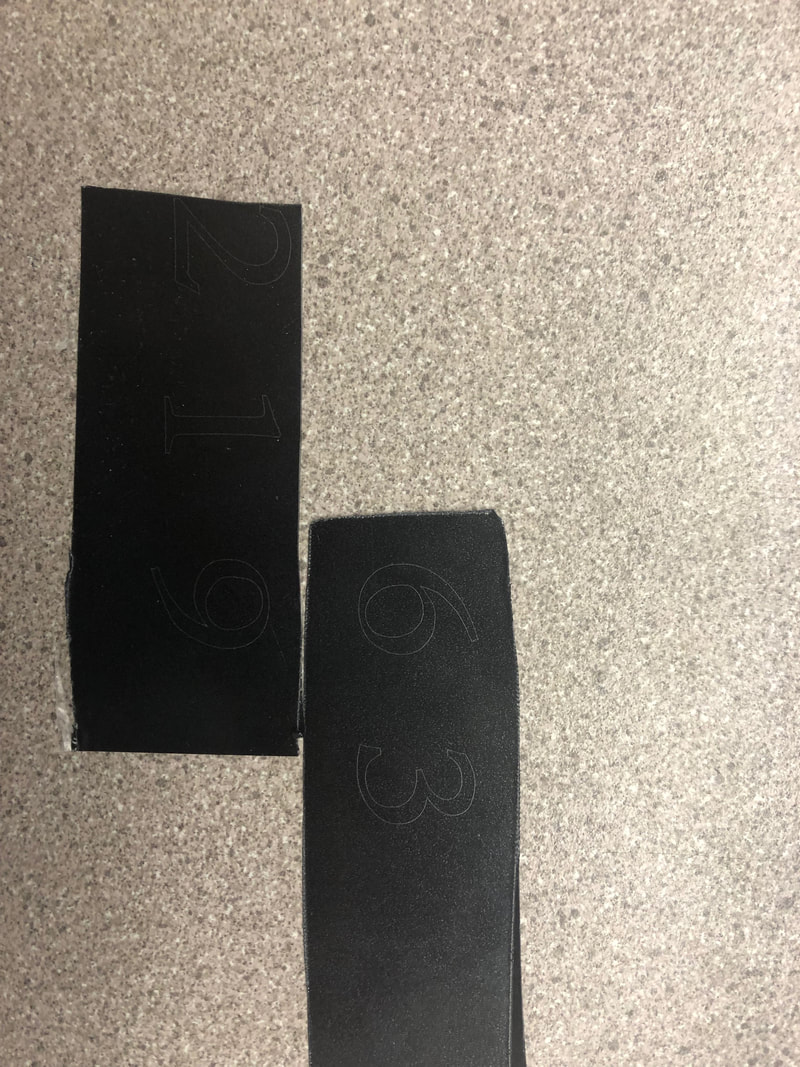
|
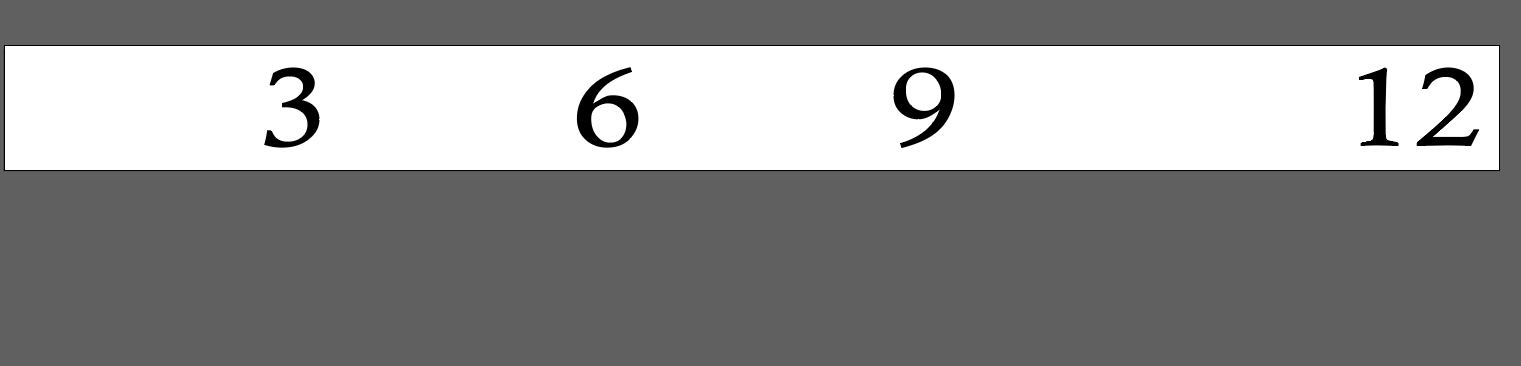
The final Machine I used was the Vinyl Cutter for the numbers on my clock. I also used Illustrator to set up the file and again it was very difficult. Next I set up my numbers on the vinyl cutter and cut out the 4 main numbers for my clock. The top left picture is my Illustrator file for my numbers. The bottom left picture are the numbers set up on the cut master on illustrator. The bottom left picture are my numbers after they were cut out with the vinyl cutter
|
Assembling/using my clock
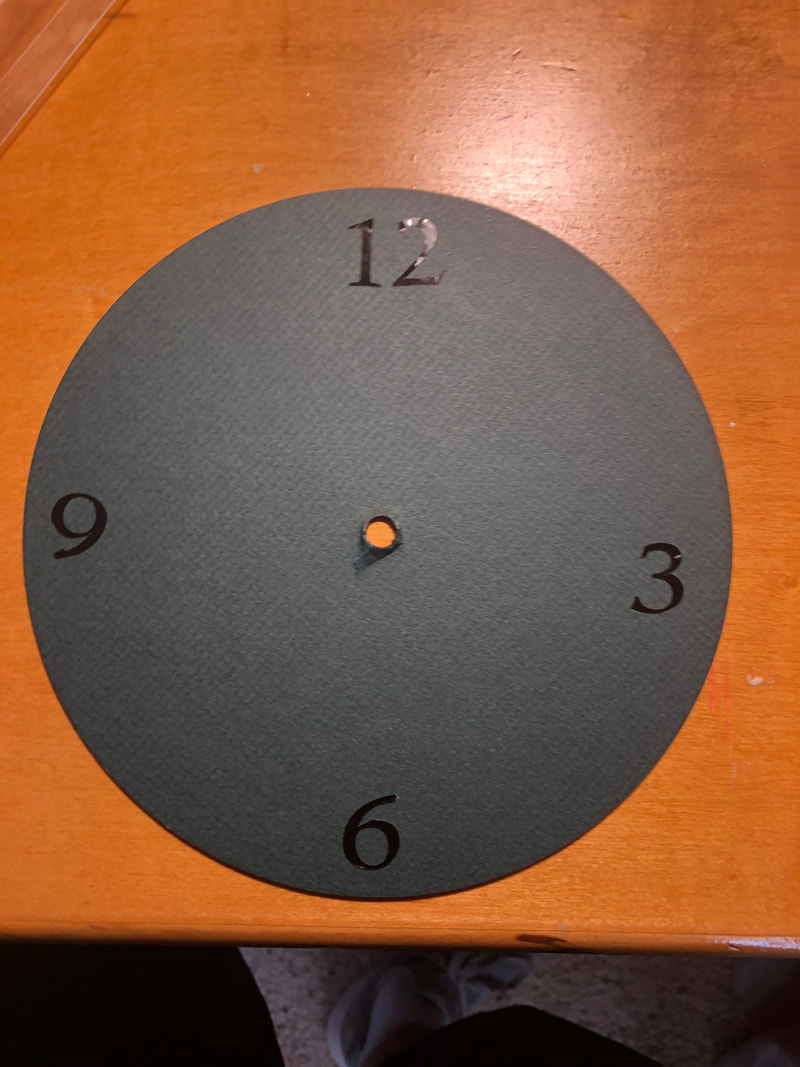
|
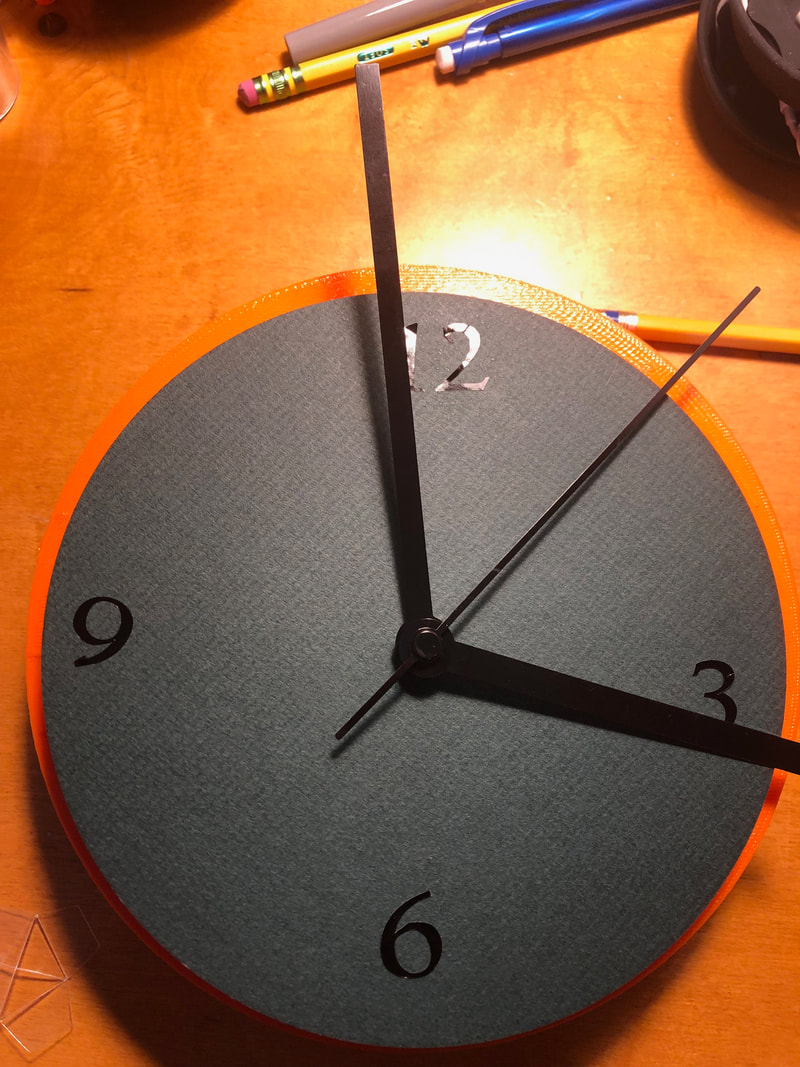
|
The last thing I had to do with this project was assemble the clock. First I used squeegees and transfer tape to apply the four numbers onto my clock. The farthest left picture are the numbers assembled onto my clock. Next I assembled all of the clock materials together to create my final amazing clock. The middle picture is my final clock.
|
What I learned
During the final project I did not learn how to use the machines since I already used all 3 of the machines before but I ended up sharpening my skills with Inventor, Illustrator, Makerbot, the laser, 3D printer and the Vinyl cutter. One thing I did learn was time management and working hard. Due to the time spent on the CNC mill and router projects I only had 3 class periods to create my clock. I had to work hard to design and print/cut each machine part each of the final 3 days of class. I was very stressed because I thought I was not going to get the project done but I was able to get my clock complete.
